How to Set Up a Drum Kit
Learning how to set up a drum kit is an essential skill for every drummer. How your drums are set up can have a big influence on the way you play. Is your seat the right height? Is the bass drum pedal attached to the bass drum properly. Which Hi Hat cymbal goes on top? All these are important questions that need answering.
When you first get your drum set it can be quite daunting seeing all the different parts. Fortunately, setting up a kit is easier than it looks. Once you understand the basic layout and how everything fits together, you can fine-tune the setup to match your style and body.
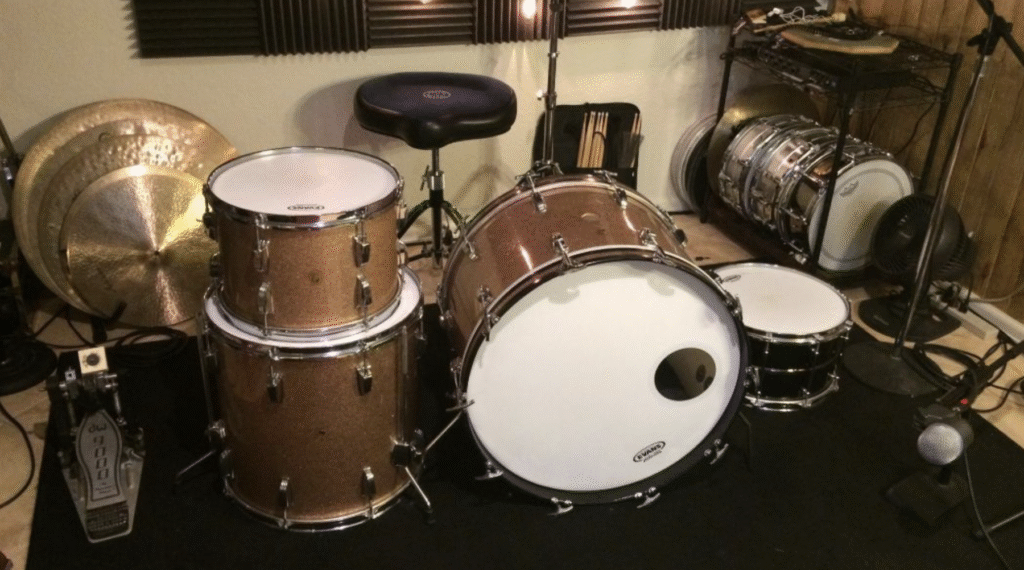
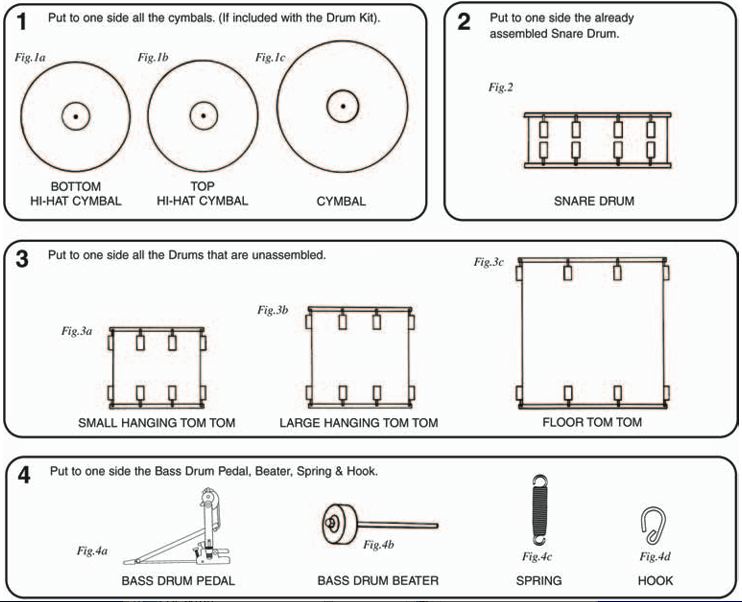
Parts of the Drum Set
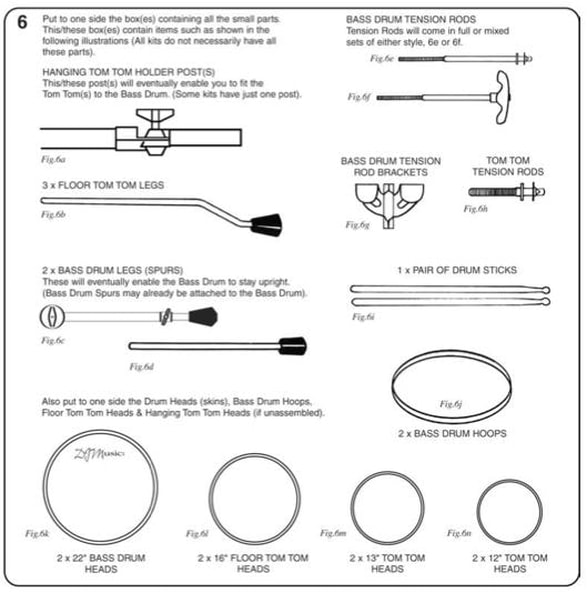
This guide is for a standard 5 piece drum set. Make sure you have all the parts of your drum set. If your drums do not have the skins on them then refer to the How to Tune a Drum Kit Guide before continuing here.
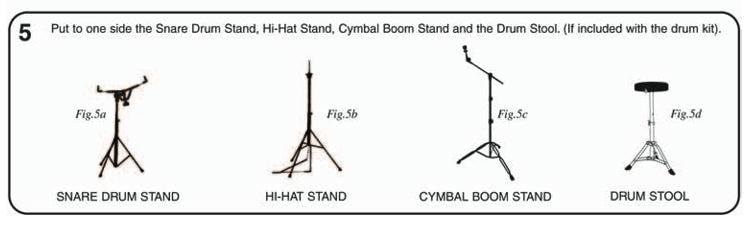
Start With the Drum Throne
Your throne is more than just a seat. It provides your foundation, balance, and posture while you play. Set it at a height where your feet rest flat on the ground. Your thighs should angle slightly downward to keep your legs relaxed.
Adjust the throne distance so you can reach the pedals comfortably. Sitting too close or too far will affect your movement and endurance. Your shins should be slightly angled forward so your ankles are not under your knees.
A solid starting position leads to a more efficient playing style. Consider using a rug under your kit to stop things from sliding. It also protects floors and marks your ideal layout.
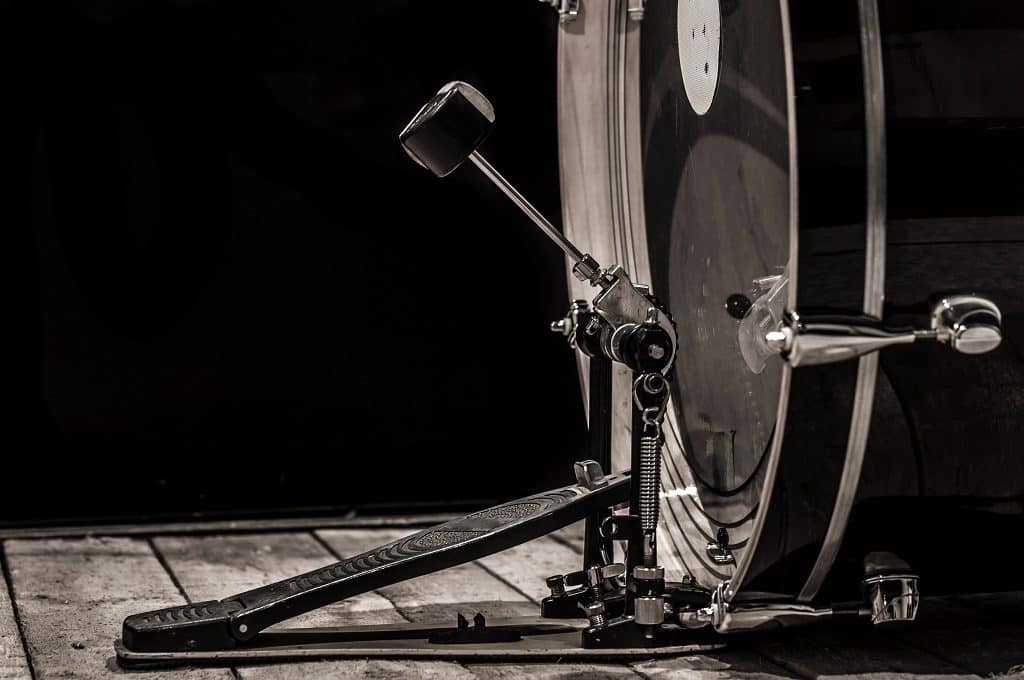
Position the Bass Drum First
Next, place the bass drum directly in front of you. Center it so your right foot rests naturally on the pedal (for right-handed players). If you’re left-handed, reverse the layout.
Make sure the drum legs (spurs) are extended and stable. This keeps the bass drum from sliding during play. Attach the pedal securely, ensuring it feels smooth and responsive when you press down.
Set Up and Align the Snare Drum
Set your snare drum between your knees, slightly to the left of the bass drum pedal. Use a snare stand to adjust the height and angle.
Ideally, the snare should sit flat or slightly tilted toward you. It must be low enough to allow rimshots, but high enough to avoid wrist strain. Take your time to find the right position—it’s the most frequently hit drum.
Mount the Toms
Toms come next, and their placement depends on the type of mounting system your kit uses. Rack toms usually sit above the bass drum, mounted using arms or brackets.
Start with the smallest tom (high tom) on the left side (for right-handers), followed by the mid-tom. Adjust their angle so they flow naturally from the snare. You want a smooth movement from snare to toms with minimal arm lift.
The floor tom stands on its own legs to your right. Position it within easy reach and adjust the height so it’s level with your snare or slightly lower.

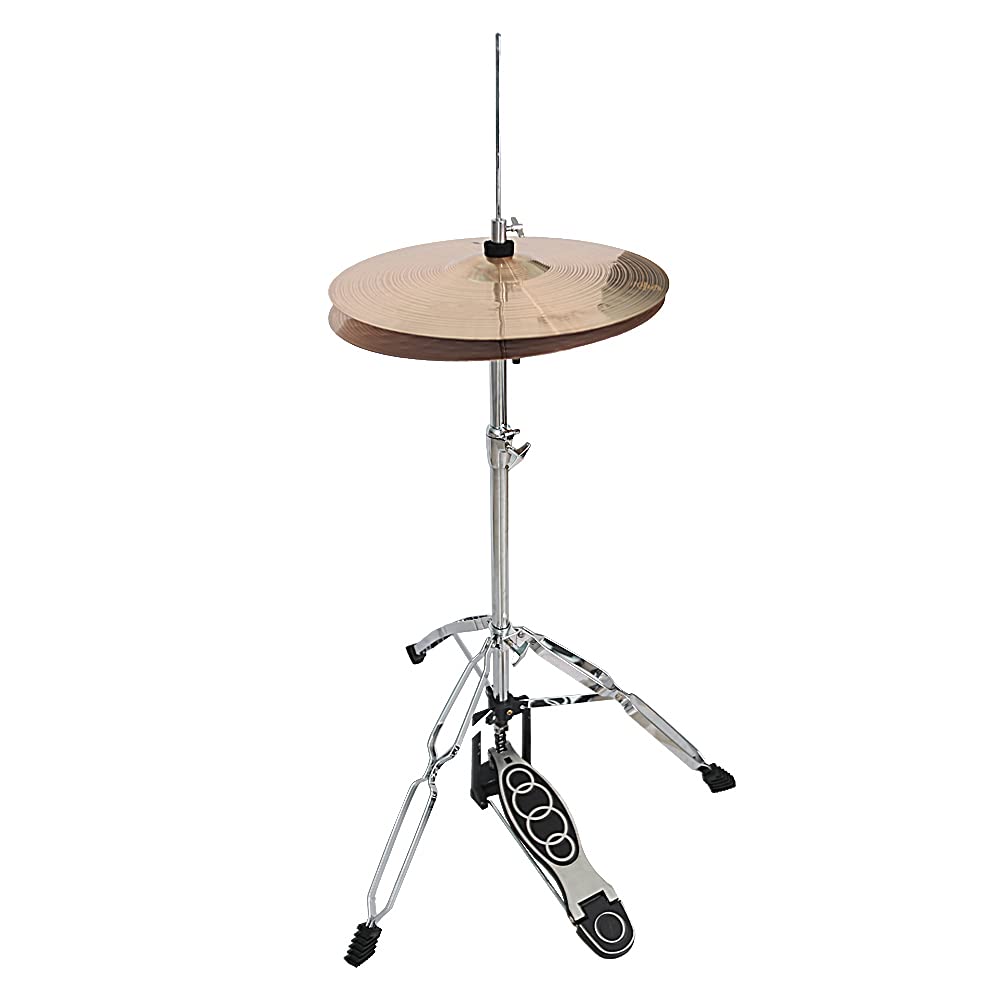
Place the Hi-Hat
The hi-hat sits to the left of your snare (again, for right-handed setups). Connect the pedal, and adjust the stand so the cymbals close tightly when pressed.
Make sure the height allows your sticks to strike the top cymbal comfortably. Many drummers prefer the hi-hat to be about an inch above snare level. Test it with basic patterns to ensure a natural feel.
Set Up Crash and Ride Cymbals
Crash cymbals usually go slightly to the left of the rack toms. Mount them on a boom or straight stand and angle them slightly downward.
Place the ride cymbal to the right of the kit between the middle and floor tom. It’s a heavier cymbal, used frequently for steady patterns. Keep it low enough for easy access but high enough to avoid crowding.
As you progress, you can add additional cymbals like chinas or splashes. For now, focus on balance and ease of movement.
Tips
- Ideally, the seat of your drum stool should be a little higher than your knee when sitting.
- The heavier of the two Hi-Hat cymbals goes on the bottom.
- Only tighten the wing nuts on the drum stands and hardware finger tight.
- Remember how you set your drums up should be about how comfortable they are to play- not just how good they look!
Double-Check Angles and Comfort
Now that everything is in place, sit at the kit and play basic patterns. Look for any tension in your arms, wrists, or legs.
Reposition any component that feels awkward. You should not have to stretch or twist your body to reach drums or cymbals. A good setup feels like an extension of your body—not an obstacle.
Practice Good Setup Habits
Setting up your drum kit may take time at first, but repetition builds confidence. The more you do it, the faster and more intuitive it becomes.
Eventually, you’ll learn to adjust your setup for different venues or jam spaces while keeping everything comfortable and efficient.
How to Set Up a Drum Kit Conclusion
Knowing how to set up a drum kit properly makes a huge difference in your drumming journey. From better posture to easier movement, every adjustment helps you play with confidence and style.
Take your time, experiment with angles, and build a layout that supports your creativity. Once you feel comfortable, you’ll enjoy practicing and performing even more.
How to Set Up a Drum Kit Video
This video provides a good visual guide for setting up a standard 5-piece drum set. Learn how to set up a drum kit from a teacher at kiwi drummer.com.